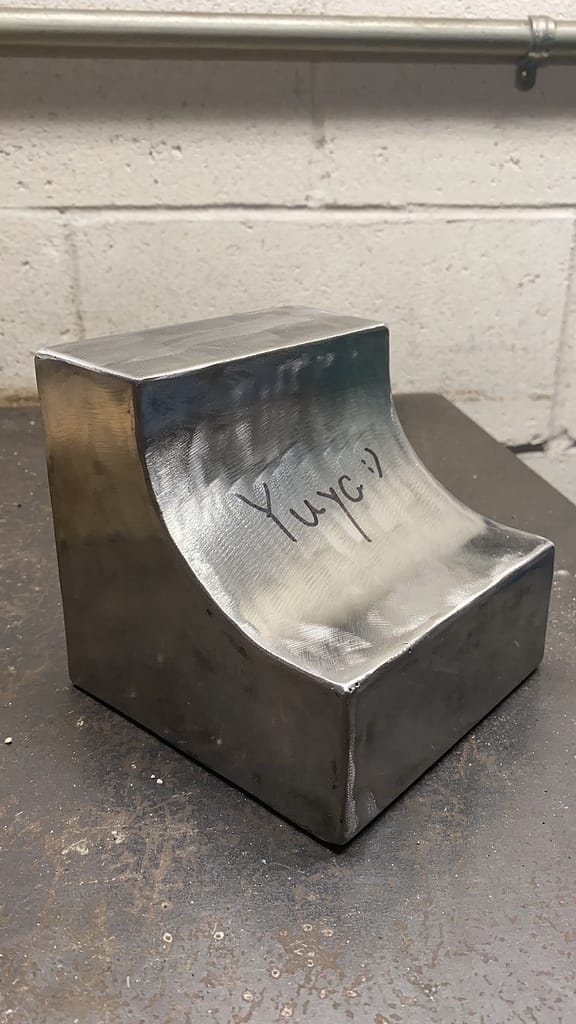
BOX WELDING
by Yuya Zhou / in MATERIAL & TECHNIQUE RELATED / on 01/30/2022
Box welding could be the first practice if you are a beginner but would love to try to weld something. The steps are quite straight forward:
- Cut the pieces and sand the rough edge with a file.
- Get ready with the set up and weld some spots before welding a line. The spot could hold the two pieces of metal in the position
- Then you can weld one inch line each time. Just remember, once you weld a short line, it would be better to change to another edge to let that place cool down a little.
- When all lines are completed, do the corner.
- Grind the cube and done!
It looks easy, doesn’t it? The devil is in the details. I will show you step by step to see how I did the metal box.
Now, let’s begin!
First, set up the equipment:
I used T.I.G. welding for this project.
First thing first, you need to set up the equipment.
- Assemble the Torch.
- Make sure the metal clamp is clamping to the metal desk or the ground.
- Check the setting on the TIG Power Supply.
- Turn power switch to “on”. Did you see the red number on the machine? It is the number of amperage that you will use for welding. In the photo, it says 72A. There is a grey round button like thing next to the number. Rotate it to adjust the number. I usually set the number between 68 to 75A.
- Fully open main argon valve.
- Step on the black foot pedal on the ground, you will notice there is a small ball in that transparent small cylinder (flow meter) that is next to the gauge. The small cylinder has measurement on the surface, that indicates how much pressure of the gas that goes to the gun. Once you step on the pedal, the tiny ball will float in the cylinder and fall again in a few seconds. It would be good if the tiny ball float at around 15 psi. You can adjust the pressure by turning the tiny yellow knob next to the pressure cylinder.
Ok, now the equipment is ready.
Second, personal protective equipment:
- A welding helmet
- A welding jacket
- A pair of leather welding gloves
Third, Bring your material and also some metal scraps for testing:
If you are a beginner, it is always better to give a test before you start on your project. You will notice there is something going weird by hearing a strange noise from the torch or the machine, you may also realize the gas is not burning right by watching the color and the length of the flame.
This is an interesting tool that I want to introduce to you. It is made of magnetic metal. It has both 90 degree angle and 135 degree angle.
Once you put it on the metal desk, it will grab the surface tightly. The function of this tool is to hold the metal piece and secure it in its position. Super convenient and easy to use.
For the material part, I assume you have already cut the metal piece and used a file to sand the rough edge smooth.
Now, you are ready to weld!

- Weld some spots first to fuse two metal pieces together.
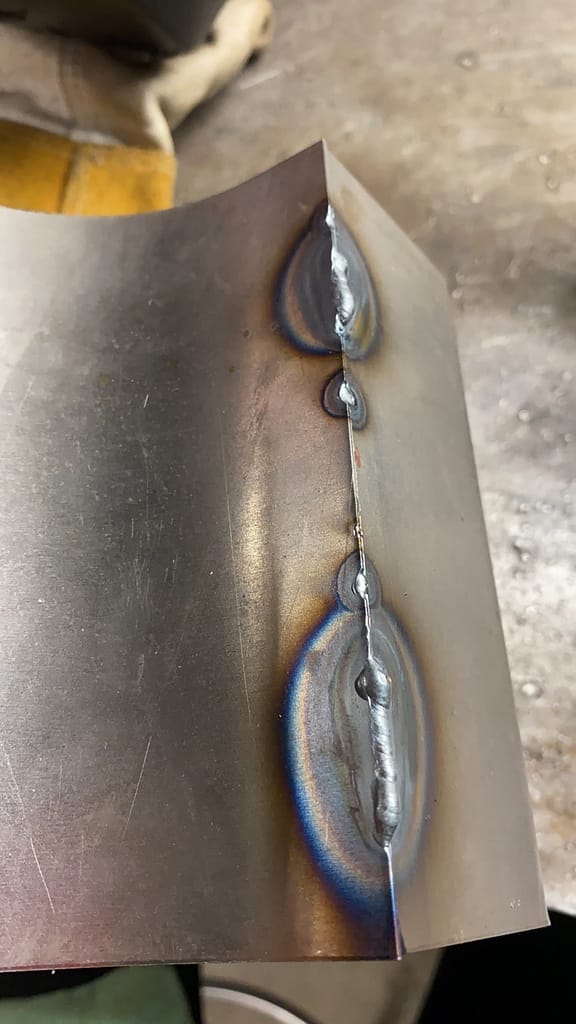
- Then weld an one inch line. You could see a light silver-colored circle appears on metal. That is because the heat during the welding process transfers to a wider range and leaves a burn mark on the surface. The longer time you work in one place, the more heat it will create and gather in that place. It will possibly melt a hole if there are too much heat on one spot. To avoid that, it is better to rotate the box and weld on another edge after the former is completed.
(When you start to weld, you could feel the flame from the torch is heating the metal surface. Do not rush. Wait for a few seconds and you will see a small “pool” on the spot, like the metal is running like water. The filler should be melted in the pool, not by the flame or the torch.)
- It looks challenging to weld the corner, however, the working theory is the same. Circle your torch slightly to heat the edge evenly and thoroughly. Add the filler carefully along the edge, start from the outside and slowly circle to the center of the corner. It feels like making a cone sundae, you need to circle slowly and evenly on the edge of the cone, and finally stop at the center on the top.
- It is the same process to fill a hole. Like making a cone ice cream. Don’t be scared by the big hole, you just need a little courage and patience.
- The last step is to grind the box: wear your safety glasses, hearing protection, the leather jacket, gloves, and a respirator is highly recommended.


- I cut the metal pieces as close as I could to the pattern. However, it is still somewhere odd and it creates some gaps when I try to place two pieces together. There is nothing I can fix but filling the gap during the welding process.
- The edge is overheated, so the metal is not fusing together but melting and creating a bigger gap. I learnt the lesson. The torch should move like you are drawing a circle rather than keeping the torch on one spot.
- I accidentally fuse the filler to the electrode, sometimes I fuse the head of the filler directly to the metal piece. That is because I hold the filler too close to the electrode or the material. To fix the first problem, I need to break where is fused and resharpen the electrode. For the second problem, all I need to do is to reheat the fused spot and separate the filler and the material.
Follow Us
Guangming Street #952 MiYun, BeiJing, China
yuya.zhou13@gmail.com | HTTPS://YUYAZHOU.COM