BUBBLE MAKING
by Yuya Zhou / in MATERIAL & TECHNIQUE RELATED / on 01/30/2022
I start with the material exploration and adapt the unique material property to the furniture making. The biggest challenge of this making process is that it requires a lots of tests. Everything is unsure and unpredictable. I need to discover the possibilities and causes of the problem while controlling variables.
There are five tests that I record below. You can see how the resin bubble was made by following all these process.
Now, let’s start the journey!
Due to the interesting material property of resin, it is soft and flexible when it is thin, it is rigid and stiff when it is thick.
Since the thickness is controllable, I assume that I am able to control the softness and the hardness by changing the thickness of the resin.

TEST1: MATERIALS COMBINATION & MOLD RELEASE
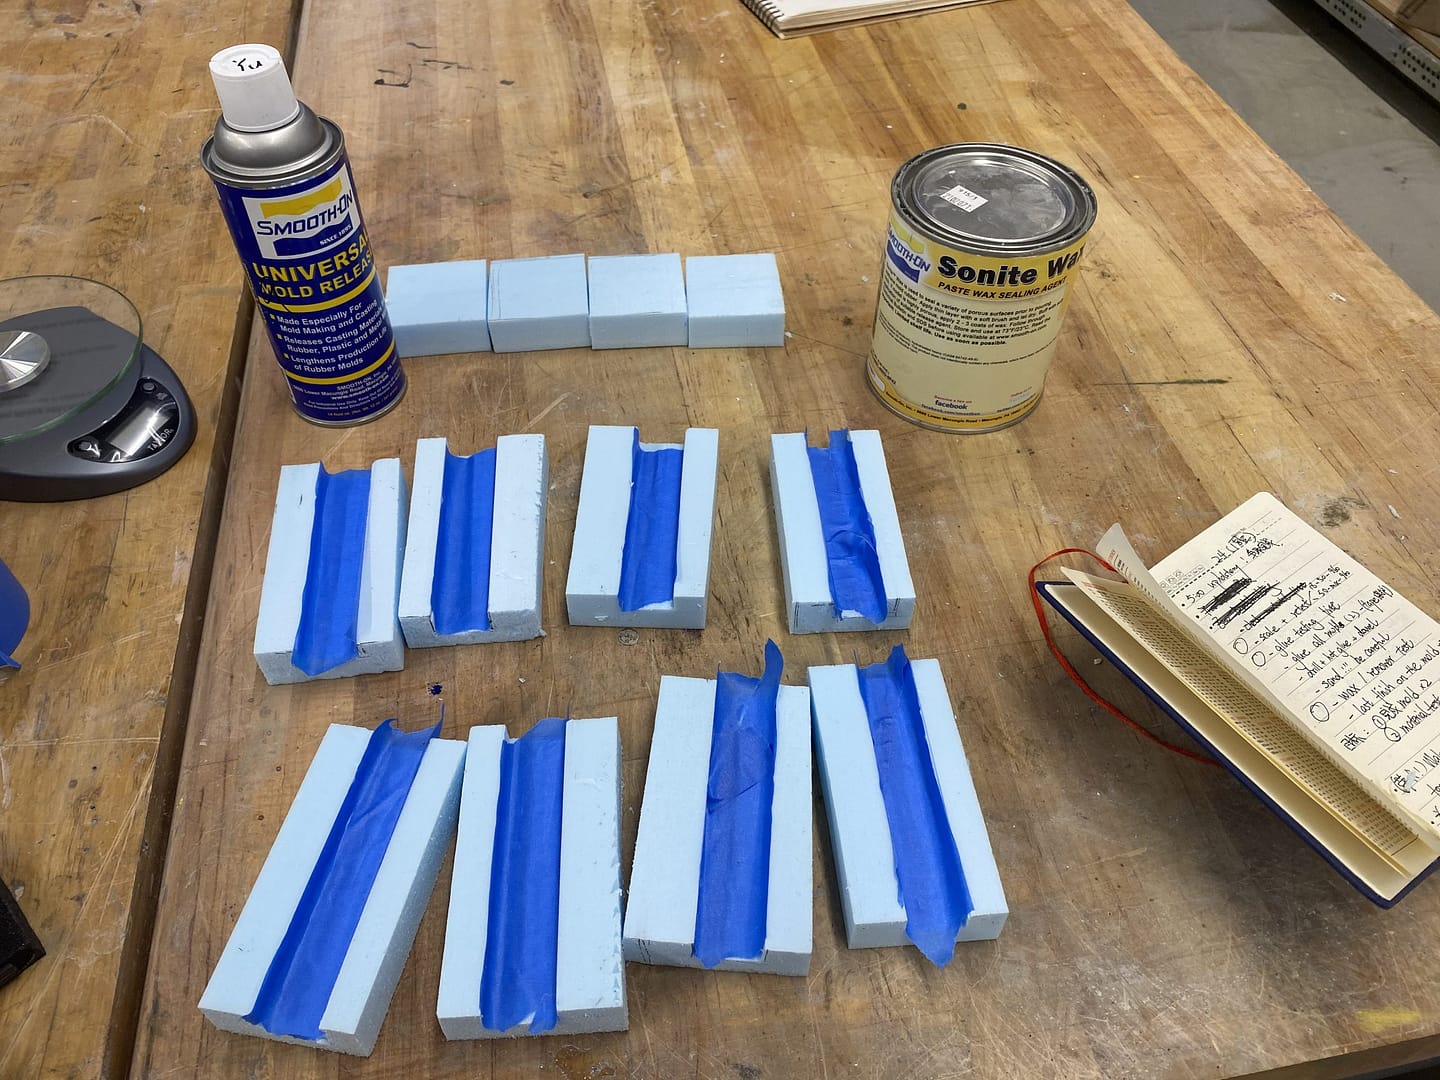
Before everything, I need to do some tests on mold release to ensure the resin can come out easily.

There are so many types of resin in the market. Some of them are rigid when they are thick, but fragile when they are thin. Some of them can be soft and resistant when they are thin, but are not hard enough to support the structure.
In that case, I have to either mix different types of resin by myself or find the one that gives a perfect balance.
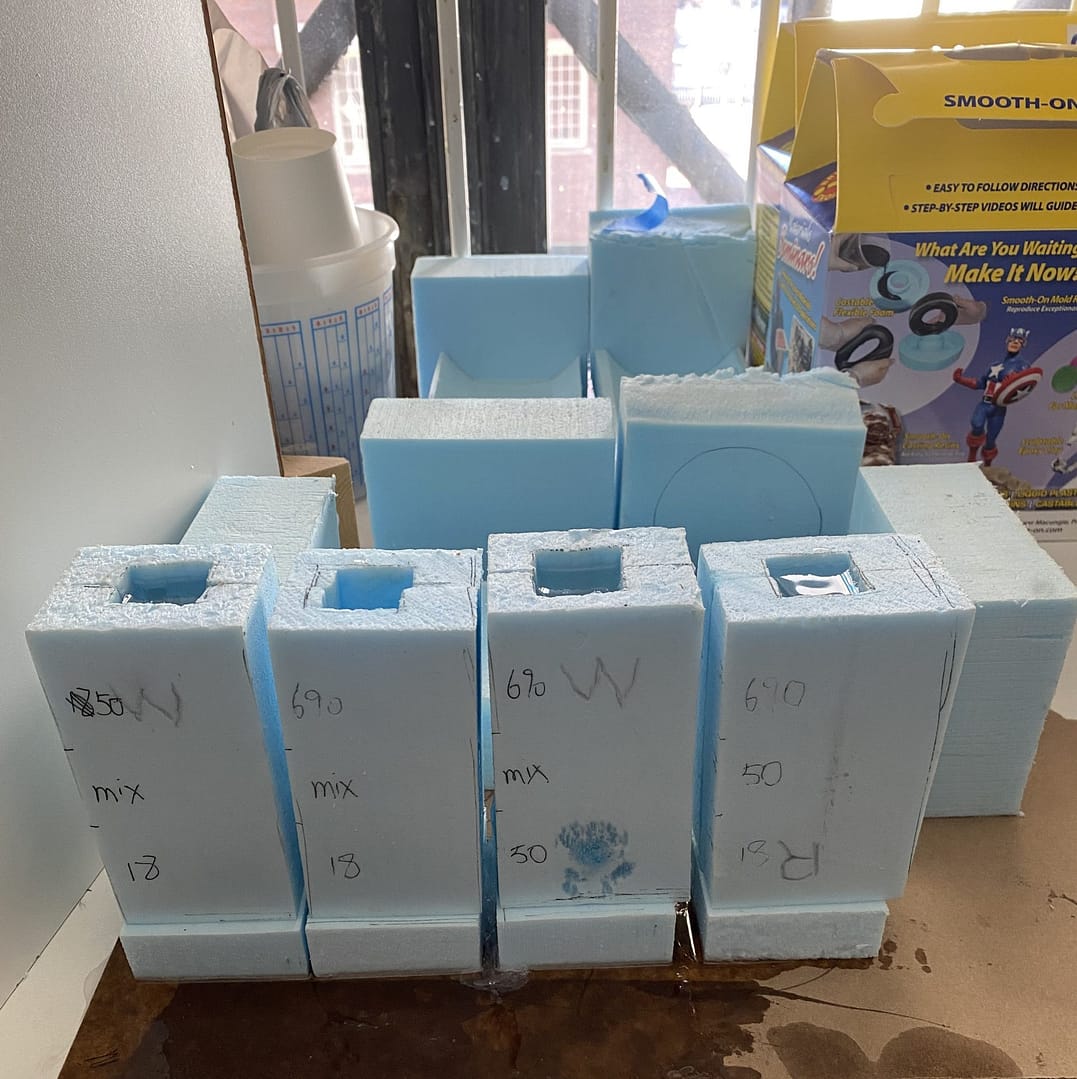
I select three types of resin and give a test to see if the idea of material mixture would work. All resin is ordered from Smooth-On company:
- The SORTA-Clear™ 18 is premium water white translucent silicone rubbers (soft);
- the Clear Flex™ 50 is a water white clear urethane liquid rubber compounds (medium);
- the EpoxAcast™ 690 is a clear casting epoxy resin (rigid).


Conclusion
- Material Mixture does not work – use single material by controlling the thickness
- 18 is way too soft. (mold size: 1x1x5 inch)
- Wax has a better outcome, compared to the release spray
TEST2: MATERIAL PROPERTY TEST
New problem: when the resin is curing, the heat will melt the wax. The wax will stick to the surface which makes the resin loses its transparency.

- Wax is not appropriate. Go back to the release spray and try to apply multiple layers on the mold.
- 50 is close to my expectation. (material determined)
TEST3: MOLD PROTECTION
I decide to use blue foam to make the mold. However, the blue foam creates tons of trouble. First, it is a porous material, which means the resin will not get a smooth surface in the mold. So, I need to paint or spray something on the foam to make the surface as smooth as I can.
Another thing is, the resin will create heat when it starts to cure. The more resin I pour into the mold, the more heat it will create during the cure time. It is important to either apply something on the mold to resist heat, or try to control and reduce heat (for example: pour the resin in a small amount by multiple times).


I apply a layer of gesso as the base to fill the porous surface, then I try three ways to protect the mold:
left – shellac, middle- none, right-acrylic spray.
I decide to CNC cut the foam to make two molds: inside mold and outside mold. I can assemble the mold together and pour the resin into the mold.


Once the resin is cured inside the mold, I need to find a way to take the inside mold out. That is why I slice the inside mold into small sections. Also, to make sure I am able to pull the section out, I insert wood dowels into the foam mold and use glue gun to secure them.
For the outside mode, I add some wood blocks along the edge. The outside mold is divided into two parts to let cured resin come out from the mold, however, it creates a gap between two parts. The function of the wood block is to provide a surface for clamps to tighten the mold so the liquid resin will not leak through the gap.
Conclusion
- Gesso could cover the porous foam and offer a better and smoother surface
- With or without shellac does not affect the outcome. However, the clear flex 50 will create heat that could up to 180 degrees F. The more material I pour, the higher the temperature will be. Shellac starts to soften at about 150 degrees F.
- So, Gesso plus Mold release will work
TEST4: GAP FILLER TEST


TEST5: RESIN LAMINATION TEST
To control the heat, I plan to pour resin liquid in multiple times. However, you can see from the photo that there is a line between two layers.
The reason of the appearance of the line: the resin will shrink during the curing process, the longer time I wait between layers, the more visible the line will be.

The pot life of resin 50 is about 25 min, and the cure time is 16 hours. However, it takes 2-3 days to completely settled and is not tacky on the surface (see the fingerprints on the surface). According to the suggestion from Smooth-On technician, I give 4 hours between two layers for testing.
After all these testing, now we are good to go. I set up everything, pour the liquid in three times and place the giant mold in a safe corner.


The good thing is, the resin cures successfully. The bad thing is, the inside mold cannot be pulled out like planned.
The multiple-layered gesso, the hot glue filler, the pressure from the cured resin…all these elements can lead to this situation. I have to destroy the inside mold to take the foam out.


In the end, there are some gaps and bubbles in the cured resin. I use this silicone to fix the problem. And that is the resin bubble! Soft and elastic at the top, while hard and rigid at the bottom! One single material but presenting two opposite material characteristic!!!
A friendly suggestion from Yuya: a silicone mold could be expensive for a large scale object, but definitely create less trouble during the process. If you have money but do not have time, do silicone; if you have time but do not have money, try foam mold; if you have both time and money, wow, then you are a life winner:)
Follow Us
Guangming Street #952 MiYun, BeiJing, China
yuya.zhou13@gmail.com | HTTPS://YUYAZHOU.COM