by Yuya Zhou / in MATERIAL & TECHNIQUE RELATED / on 01/30/2022
This is a contoured seat I made in this winter (2022.1) I really enjoy the making process. Working with foam and fabric is so stress-releasing.
As you can tell from the very first photo, the contoured seat has a round raised edge at the back, and a raised dot at the front. It is a shape that is designed to follow and hold the contoured outline of the butt as much as possible. Because when the pressure (the body weight) keeps the same, the wider the force area, the less the intensity of pressure. The contoured seat could spread and release the pressure from the center of the butt and make people sit in a more comfortable way.
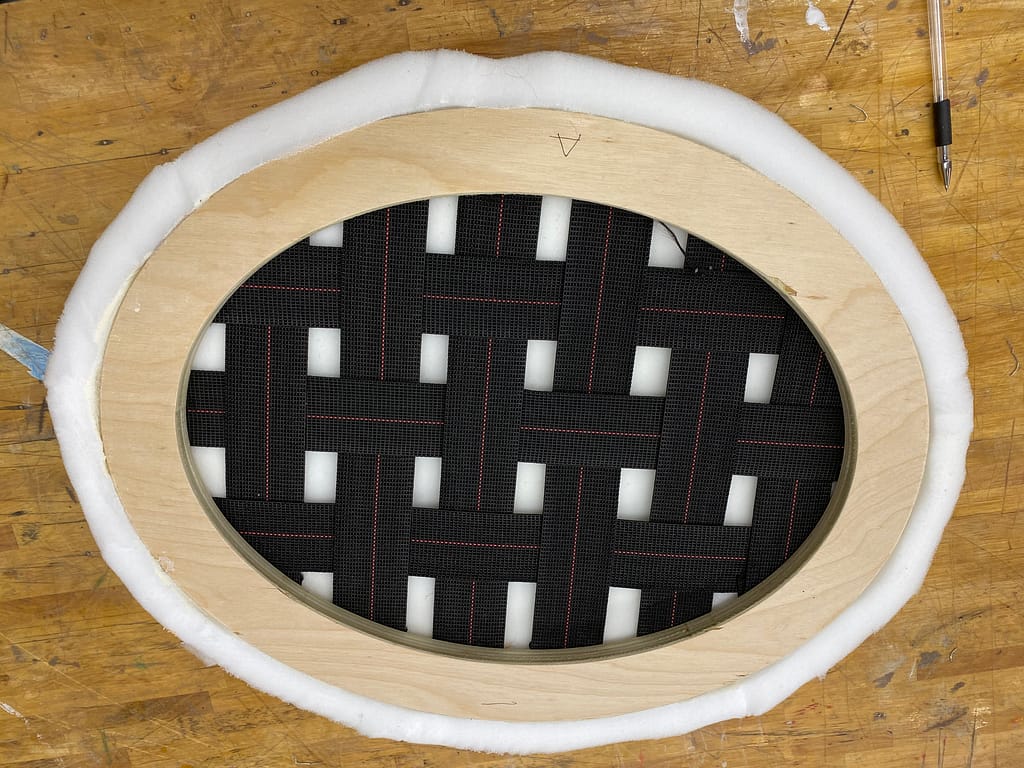
Step 1: Webbing
I have introduced how to do the webbing, what tool could be used to complete the webbing in SEAT UPHOLSTERY post.
I forget to take some photos for the contoured seat webbing step. Anyway, the process is the same. But this time I use a circle wood frame, not a square.
webbing
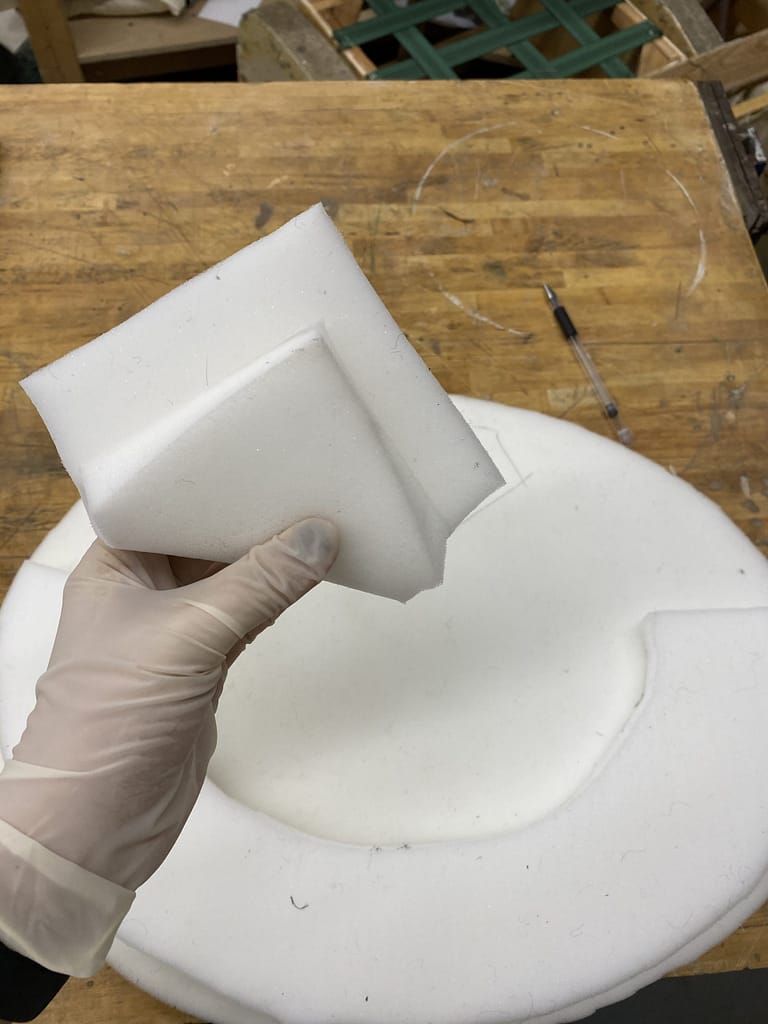
Step 2: Foam
After you complete the webbing, then you can start with cutting some foam.
I use the firm foam as the first (bottom) layer. Then the medium foam as the second layer, the soft foam as the top layer to cover everything.
Usually, there are four numbers on the foam, for example: 1820, 1835, 1845, 2635, 2645… the first two number (18/26) indicate the Density, the second two numbers (20/35/45) indicate the Indentation Load deflection (ILD)
The higher density means the better quality. The higher ILD means the “firmer” the foam will be.
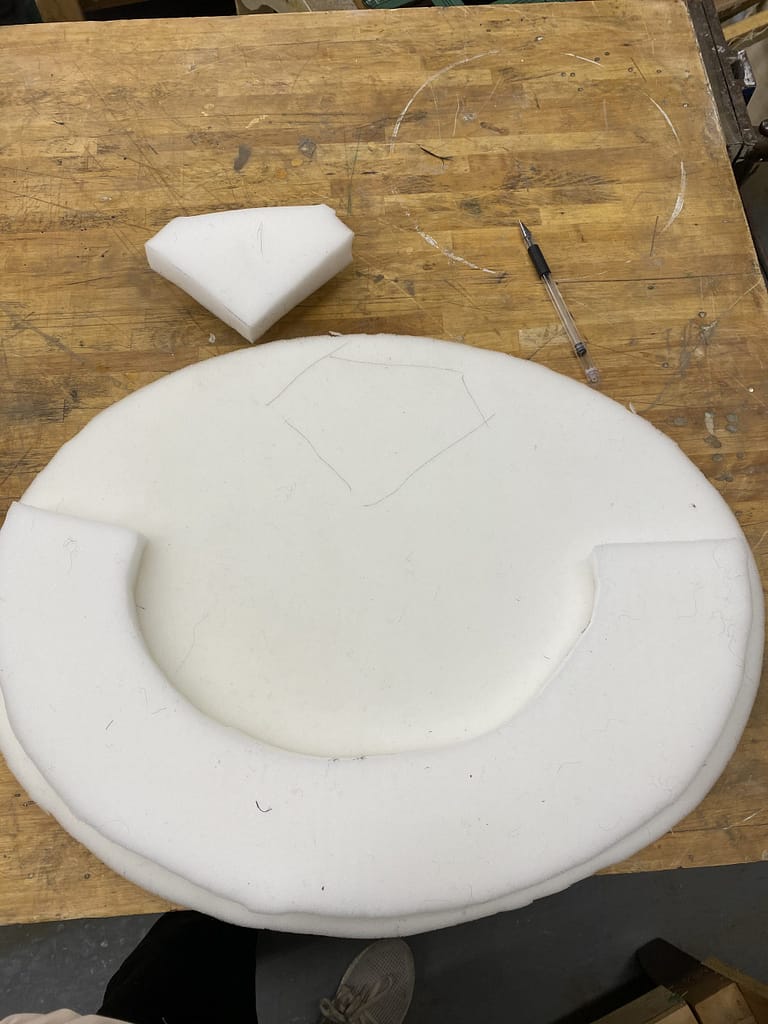
To make the contoured shape, you can cut a piece of foam, use the spray gun to spray the glue on the foam, fold it and then you create a thickness.
TIP: For a better glue result, spray the glue on both sides and spray it evenly, do not over spray the glue. Wait for couple seconds until the surface feels tacky. Then you can press the both sides together.
So:
one layer of the flat firm foam to cover the wood frame and the webbing;
cut and fold medium foam to create the contoured shape;
one layer of soft foam to cover on the top.
When you start to cut the soft foam, make sure your leave some extra foam on the edge. Because when you glue the soft foam to the seat, you start from the center. You will notice that due to the contoured shape, it requires some extra material to cover the whole seat.
Now, The last fabric.
It is almost the same process compared to foam glueing:
leave some extra fabric and cut the material;
spray the glue at the center first, press the fabric gently to the seat and try to get rid of all folds or wrinkles;
spray the glue to the edge and complete the edge;
use a staple gun to staple all extra fabric to the bottom.
TIP: When you staple the fabric, find the top center, bottom center, also the center on left and right side first, staple the fabric on the four spots. It gives you a guidance like how much fabric should be stapled in this area.