by Yuya Zhou / in MATERIAL & TECHNIQUE RELATED / on 01/30/2022
Steps:
Chop saw – get appropriate length
Jointer – smooth one plane and also one side that is 90-degree angled
Planer – get the required thickness
Table saw – cut the rest surfaces flat and keep all angles 90-degreed.
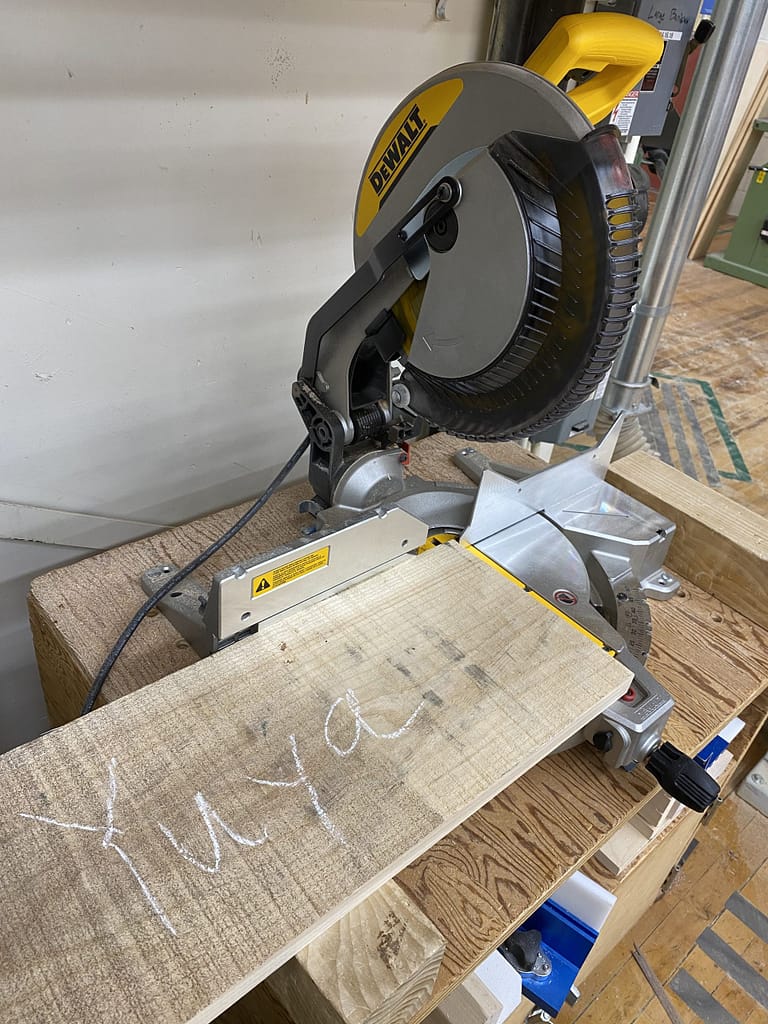
Step One: Chop Saw
It is usually the first step to mill the lumber when you get a rough wood board.
The Chop Saw is not designed to get an accurate cut. Sometimes the end side of the wood board could have some cracks hidden inside the board due to the dryness. It is better to cut three or four inches off at the end, which means you need to select a longer board when you are in the timber mill.
For instance, you need two 15-inches-long wood boards. You could either buy two wood boards that are more than 21 inches long for each and cut all four ends off on the chop saw, or you could buy a long wood board that is more than 37 inches long and cut the two ends off on both sides.
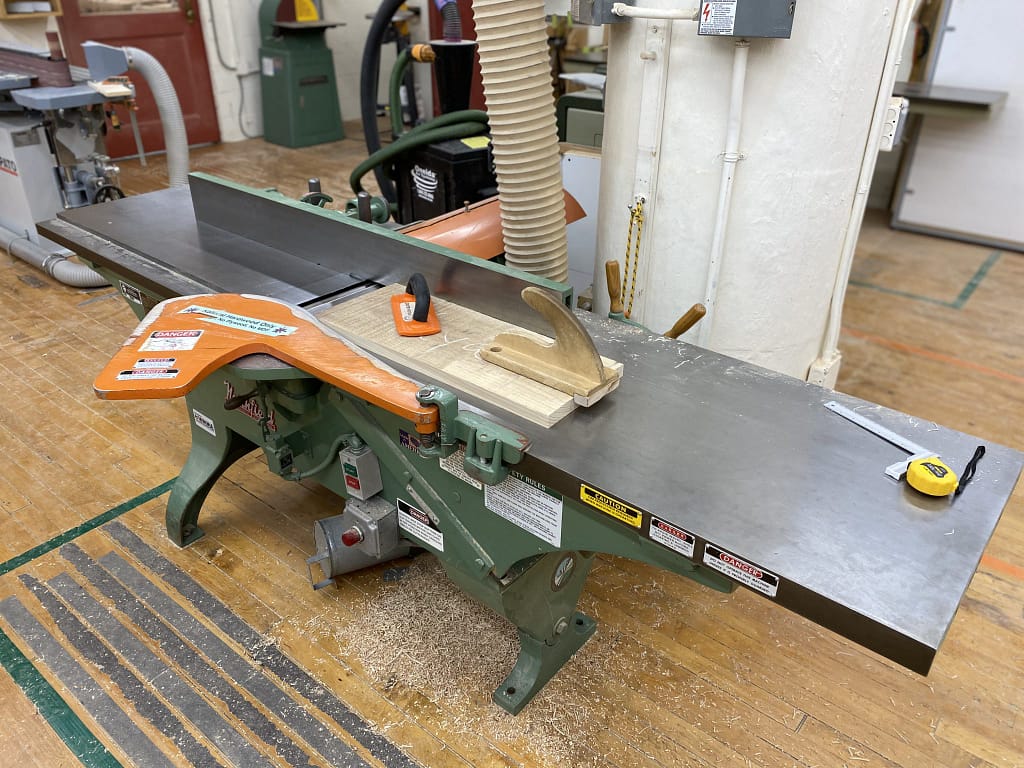
Step Two: Jointer
After the rough cut on the chop saw, you can set up the jointer to get the first smooth plane on your wood board.
Make sure the length of your wood board meets the requirement of the jointer machine. Usually, the machine requires a 15-inch length minimum to keep you safe. It is better to double check with the shop monitor since the minimum would change depending on the size of the jointer machine.
For the side, it is okay to grab the board by the hand and push the board against to the fence as long as your hand is not close to the blade.
The side your cut on the jointer will be 90-degreed to the first plane.
It is not necessary to cut the other side on the jointer. The first right-angled side could be the reference when you cut the rest on the table saw. We will talk about it later in the table saw part.
Step Three: Planer
The planer is used to get a paralleled plane according to the first plane you smooth on the jointer.
The blade is settled at the top of the machine, which means the machine will mill the board from the top. In that case, you need to put the rough plane on the top and the smooth one onto the machine bed.
For example, the wood board I have is one inch thick. I want to trim it down to three quarters. So, what I need to do is, first, set the machine to the one-inch thickness and start the first cut. Then remove the material by repeating the process. Most planers remove a maximum of 3 mm each time.
It is better to use chalk to draw a mark on the smooth plane before you put the board in the machine so that you will not get confused and lose your reference plane after several times of milling.
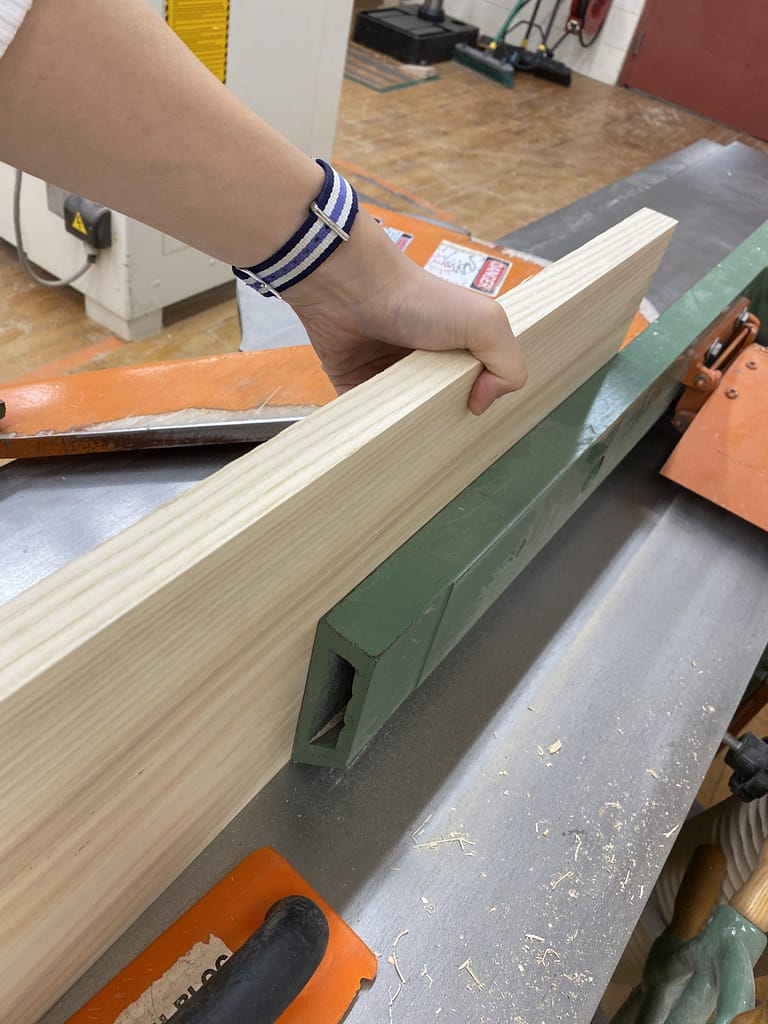
You should have three smooth surfaces so far after processing all machines above – two smooth paralleled planes and one smooth side that is 90-degreed to the plane. Then, you can bring the wood board to the table saw.
Step Four: Table Saw
There are three main parts for the table saw: the table, the blade, and the fence.
Same to the Jointer, it is always good to check the angle of the blade with an angle square first. Rise up the blade and make sure the angle is correct. Then lower the blade and keep the top of the blade is a little bit higher than the thickness of the board (like I showed in the photo).
The fence should be set next to the wood board as cutting guidance. Put the smooth side against the fence to get a vertical cut on the other side.
Use a handle when you have a narrow board.
Compared to the vertical cutting, the cross-grain cutting has less reference surface against the fence. It could be dangerous to cut across the grain without any protection. In that case, a crosscut sled is helpful to complete the cross-grain cutting.
Now, you have a smooth wood board with six surfaces paralleled!
Additionally, always remember to wear your protection before you walk into the woodshop.
And do not forget to do the cleaning after you finished!